
Using
Assembling a Desko standing desk in 30 minutes

Written by Giedrius Zdramys, Director, Gieto Group Ltd (Desko)
Updated 9 September 2026
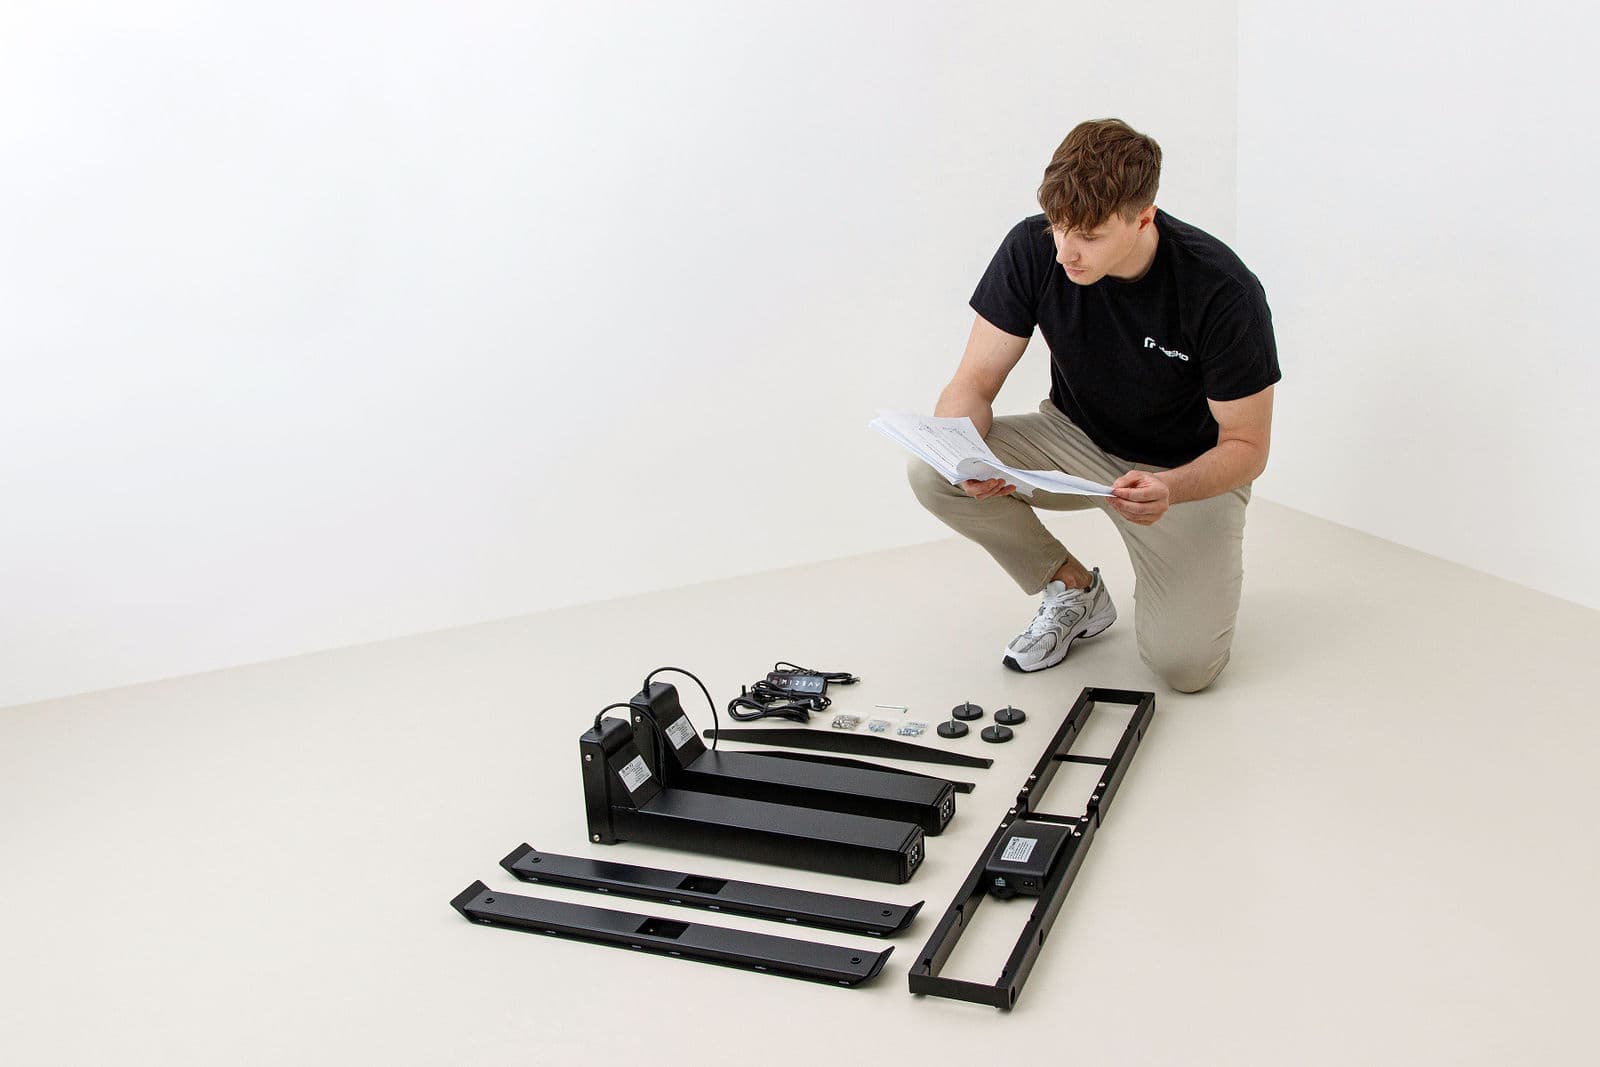
A Desko takes roughly half an hour, and the whole build is filmed end to end below if you would rather watch than read.
One person can do it. Two make the final flip much easier, and that is the only step where it genuinely matters.
Short answer
Budget about 30 minutes. Work upside-down on the floor with the desktop face down on its packaging, build the frame onto it, fit the keypad and controller, then turn the desk over with a second pair of hands. Everything you need is in the box.
Before you start
Clear a space bigger than the desk and keep the flattened cardboard — you will build on top of it so the desktop does not get scratched.
The desk arrives in two parcels, the frame and the top, and they may be delivered a few hours apart. Check you have both before you begin.
The six steps
- 01Lay the desktop face down on its packaging and identify the pre-drilled holes.
- 02Attach the two legs to the crossbar, leaving the bolts finger-tight so the assembly can still flex into position.
- 03Position the frame on the underside of the desktop and screw it down — the width is adjustable, so set the feet as wide as the top allows.
- 04Tighten everything in a diagonal pattern, the way you would tighten wheel nuts, so the frame pulls down evenly.
- 05Fit the touchscreen keypad under the front edge and connect the motor cables to the control box. The plugs only fit one way.
- 06Turn the desk over — this is the two-person moment — plug it in, and run the reset: hold the down button until it reaches the bottom and clicks.
The two mistakes people make
Fully tightening the frame before it is square. Leave everything finger-tight until the whole frame is on the top and aligned, then tighten in a diagonal pattern. Tightening as you go locks in a twist you will feel as wobble later.
Skipping the reset. A new desk needs its initial calibration or the memory presets will not save correctly. Hold the down button until the desk reaches its lowest point and clicks.
Watch the whole build
The films on the guides page show every step in real order — one filmed on the V1 frame and one on the V3. The V2 process is near-identical to the V1.
If a part is missing or damaged, contact us before improvising; we would rather send the part than have you make do.
After the first fortnight
Re-tighten every bolt after about two weeks of use. Everything settles, and this ten-minute job is the single most effective thing you can do to keep the desk feeling solid at full height.
What is in the boxes
A complete desk arrives as two parcels, and it is worth checking both before you start rather than halfway through.
- 01Frame parcel: two legs with motors, the crossbar, two feet, the control box, the touchscreen keypad and its bracket, all fixings sorted by step, and the hex tools.
- 02Desktop parcel: the top, pre-drilled, with rounded corners and cable ports both sides.
- 03The V3 also includes its cable management channel.
Keep the packaging until you are sure you are keeping the desk — a return under our 60-day policy needs the original boxes.
Doing it on your own
Everything up to the final flip is a one-person job if you work on the floor. The flip is where a second pair of hands genuinely helps: a 140 cm desk with its frame attached is awkward rather than heavy, and it is easy to catch a foot or a keypad on the floor.
If you are alone, turn the desk on its side first, then walk it upright rather than lifting it. Clear the floor around you before you start.
Troubleshooting
Scroll the table →
| Symptom | Cause | Fix |
|---|---|---|
| Desk will not move at all | Not calibrated after assembly | Hold the down button until it bottoms out and clicks |
| One leg moves before the other | Motor cable loose, or no reset | Reseat both motor plugs, then reset |
| Keypad blank | Handset cable not fully home | Unplug and reconnect at the control box |
| Desk rises then stops and drops slightly | Anti-collision triggering | Check nothing is under or above the desk, then reset |
| Wobbles after a fortnight | Bolts have settled | Re-tighten everything in a diagonal pattern |
Where to put the keypad
The keypad mounts under the front edge and its position is worth thinking about for ten seconds rather than fixing it wherever the holes first line up.
Put it on the side of your dominant hand, far enough in from the corner that you do not catch it when you push your chair back, and clear of where a drawer or a CPU mount will go. Most people want it roughly a hand's width in from the right-hand edge.
Cables, before you turn it over
The moment the desk is upside down is the easiest it will ever be to route the cables, and almost everyone skips it.
Run the motor leads along the crossbar and clip them out of the way, leave a generous loop where the cable leaves the frame so nothing is pulled tight at full height, and if you are fitting an under-desk tray or a cable spine, fix it now while you can see what you are doing.
Questions, answered.
How long does assembly really take?+
About 30 minutes at a comfortable pace for a first-timer, less if you have built one before.
Do I need my own tools?+
No. The hex tools are in the box. A powered screwdriver speeds up fixing the frame to the top, but is not required.
Can one person do it?+
Yes, apart from turning the finished desk the right way up, which is much safer with two.
Why does the desk not move after assembly?+
It usually needs its reset: hold the down button until it reaches the bottom and clicks. That calibrates the controller.
Written by Giedrius Zdramys, Director, Gieto Group Ltd (Desko)
Updated 9 September 2026
Read next
Ready to choose?
Three frames, three sizes, three finishes.